Files
Revisium supports file attachments at any level of your schema. Files can be stored on the local filesystem for standalone or simple single-node deployments, or in S3-compatible storage for production and multi-node deployments.
File fields are like slots in your schema — you define where files go, the platform handles upload, storage, and metadata. Any file type is supported: images, documents, videos, archives, or any other binary. Unopinionated: embed files directly in your tables, create a dedicated assets table, or mix both — structure it however fits your project.
Storage Providers
| Deployment | Default storage behavior | File URLs |
|---|---|---|
| Standalone | STORAGE_PROVIDER=local, STORAGE_LOCAL_PATH=<data>/uploads | Served through PUBLIC_URL/files/..., for example http://localhost:9222/files/<hash> |
| Self-hosted single node | Set STORAGE_PROVIDER=local and STORAGE_LOCAL_PATH explicitly if you want local uploads | Served through FILE_PLUGIN_PUBLIC_ENDPOINT, defaulting to http://localhost:{PORT}/files |
| Docker/Kubernetes/multi-pod | Set STORAGE_PROVIDER=s3 explicitly, or leave it unset only when all S3_* variables are present so self-hosted S3 autodetection can select S3 | Served through the configured FILE_PLUGIN_PUBLIC_ENDPOINT |
If no storage provider is configured in self-hosted mode and no complete S3 configuration is present, file fields still work in schemas but uploads are disabled. Standalone is different: it enables local file storage by default.
FILE_PLUGIN_PUBLIC_ENDPOINT is the exact public URL prefix written to each uploaded file's url. Include /files in the value if your deployment serves files under /files; omit it only when the endpoint itself is the file root. For example, with FILE_PLUGIN_PUBLIC_ENDPOINT=https://files.example.com/files, uploaded file metadata contains URLs such as https://files.example.com/files/<hash>.
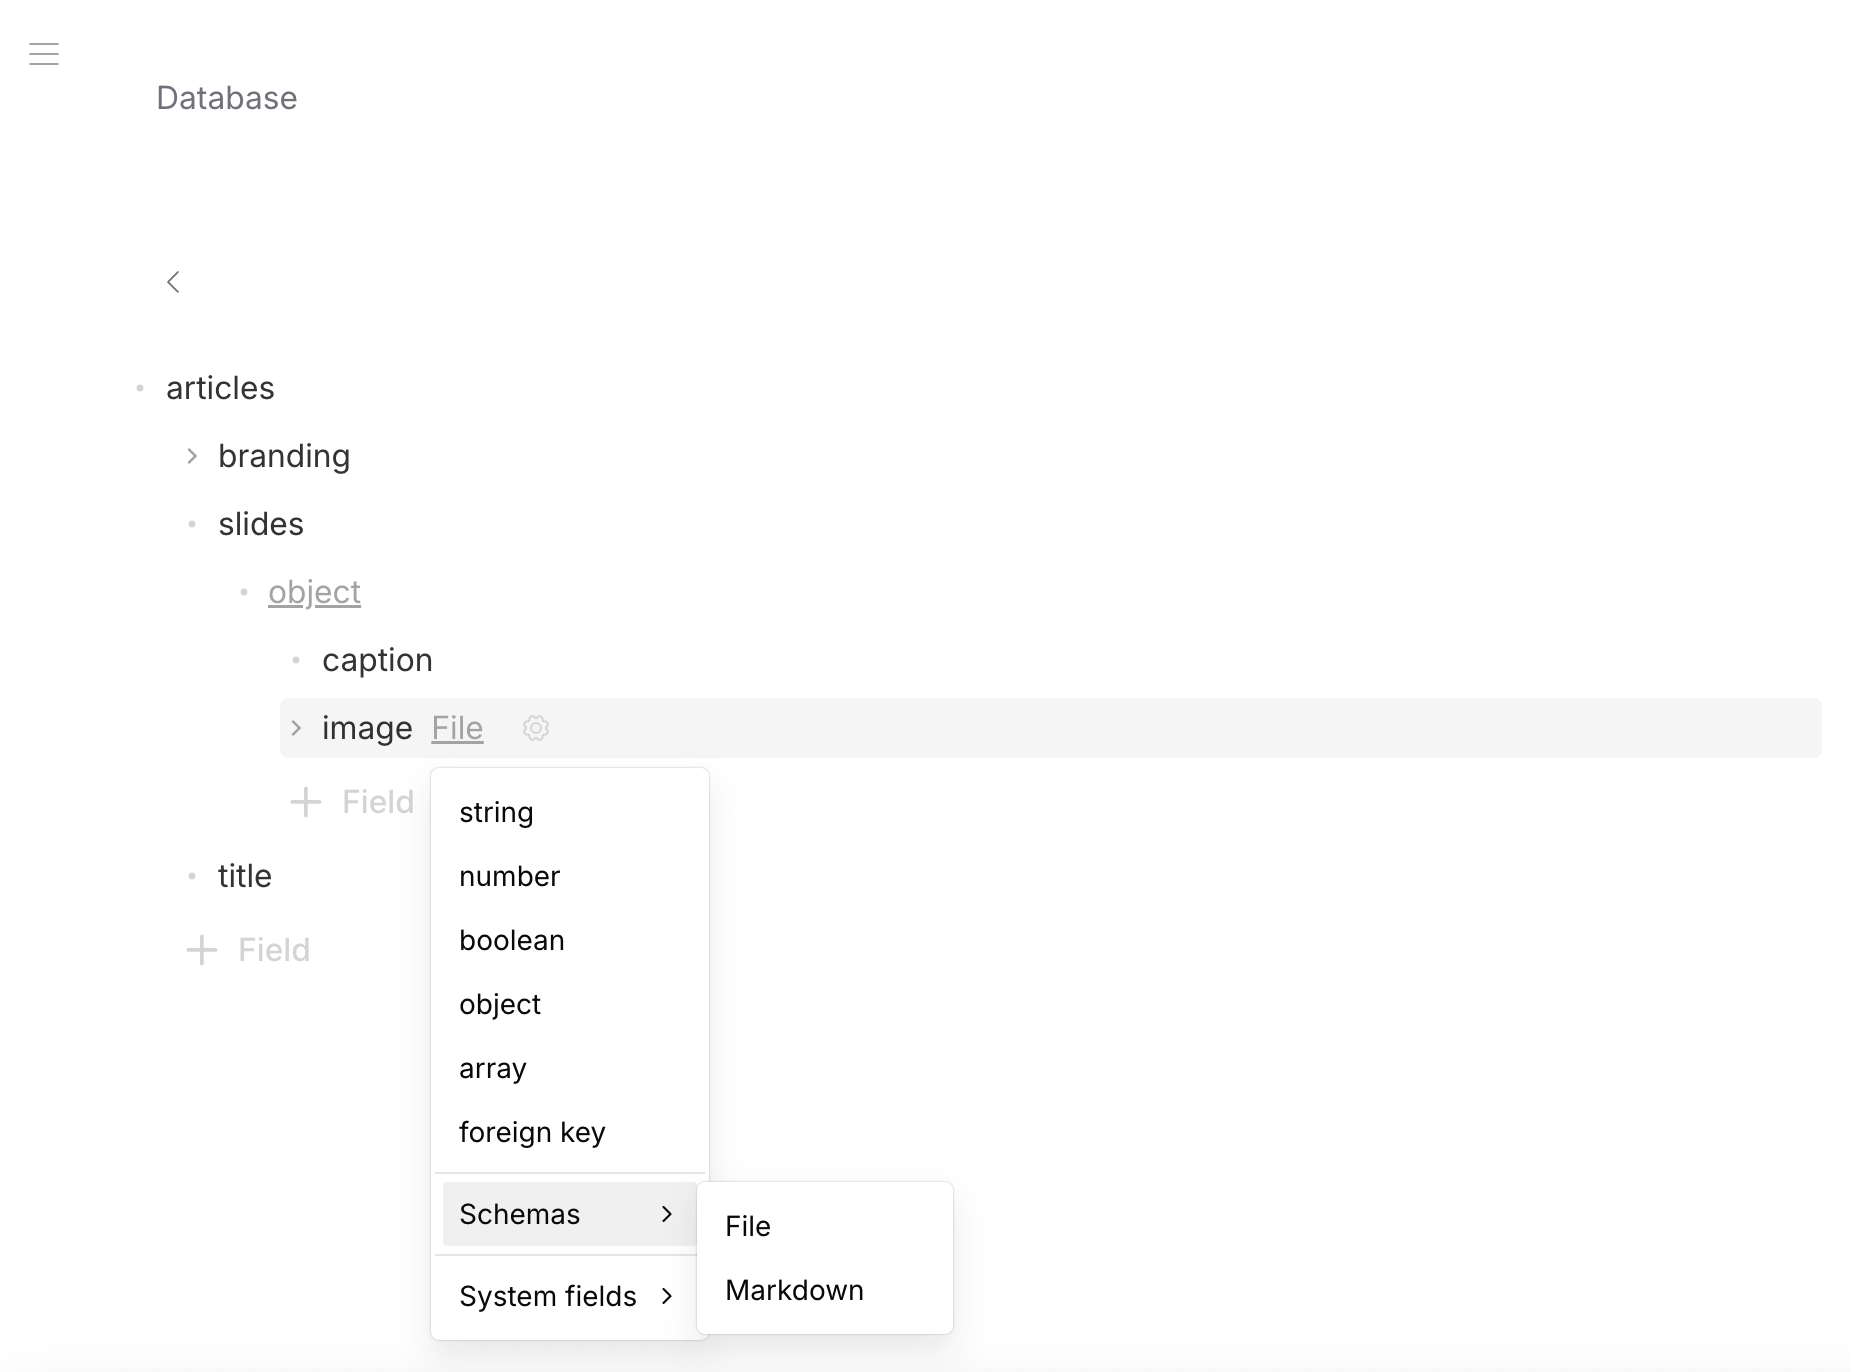
File Fields in Schema
Use the File system schema reference ($ref) to add a file field. Works at any level — root, nested objects, arrays:
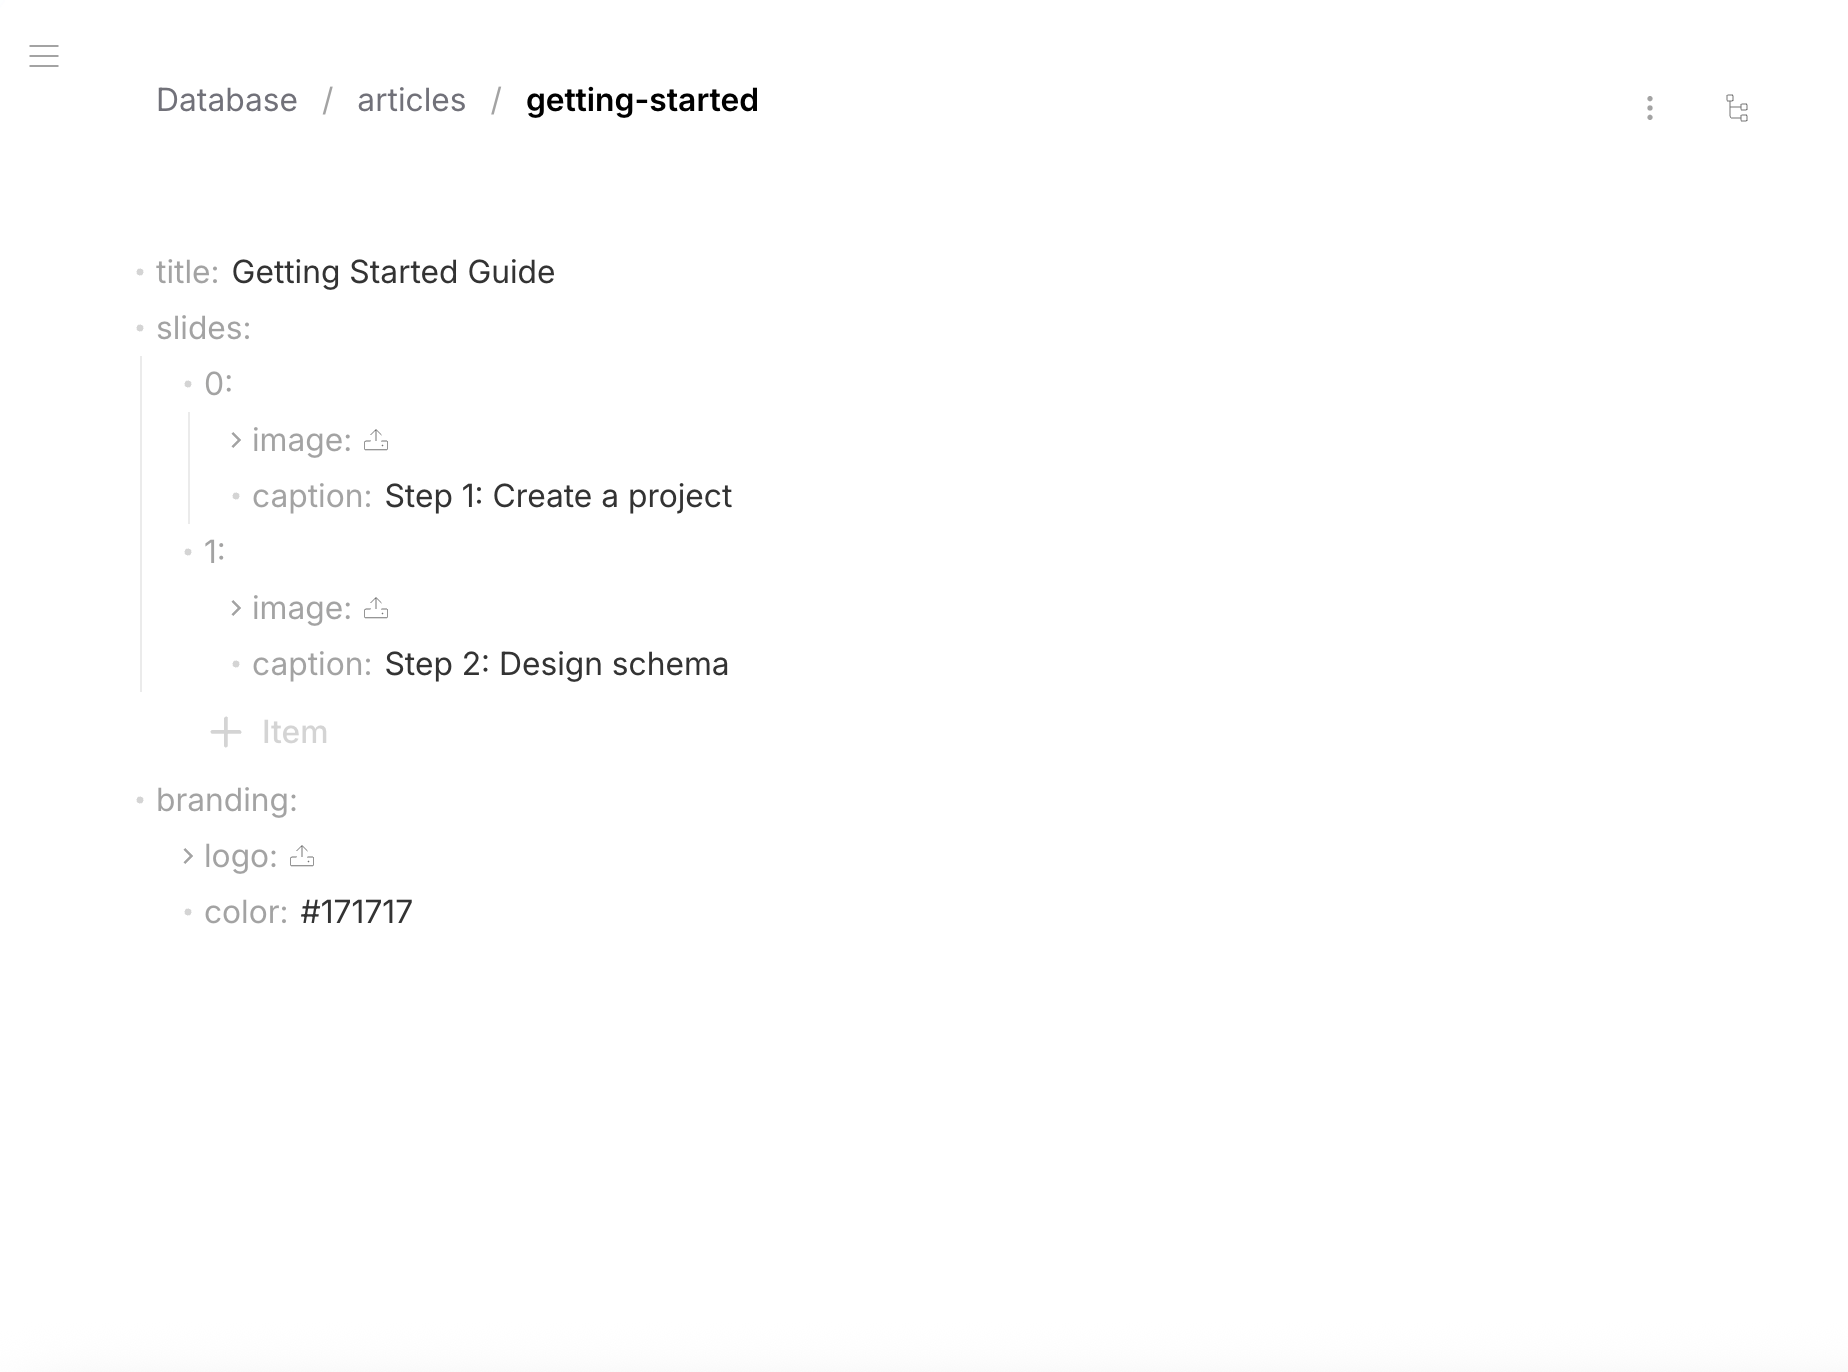
- Data
- Schema
{
  "title": "Getting Started Guide",
  "slides": [
    {
      "image": { "status": "uploaded", "fileId": "...", "url": "http://localhost:9222/files/Ua4ZaUehur50VOp2odFvy", "fileName": "step1.jpg", ... },
      "caption": "Step 1: Create a project"
    },
    {
      "image": { "status": "ready", "fileId": "...", "url": "", "fileName": "", ... },
      "caption": "Step 2: Design schema"
    }
  ],
  "branding": {
    "logo": { "status": "uploaded", "fileId": "...", "url": "http://localhost:9222/files/GVke8IlpccUuYaG7pC2rR", "fileName": "logo.svg", ... },
    "color": "#171717"
  }
}
{
  "type": "object",
  "properties": {
    "title": { "type": "string", "default": "" },
    "slides": {
      "type": "array",
      "items": {
        "type": "object",
        "properties": {
          "image": { "$ref": "urn:jsonschema:io:revisium:file-schema:1.0.0" },
          "caption": { "type": "string", "default": "" }
        },
        "required": ["image", "caption"],
        "additionalProperties": false
      }
    },
    "branding": {
      "type": "object",
      "properties": {
        "logo": { "$ref": "urn:jsonschema:io:revisium:file-schema:1.0.0" },
        "color": { "type": "string", "default": "" }
      },
      "required": ["logo", "color"],
      "additionalProperties": false
    }
  },
  "required": ["title", "slides", "branding"],
  "additionalProperties": false
}
File Schema
The File schema is a pre-defined system schema — you don't need to create it. Each file field is an object with 10 fields. All are read-only except fileName:
| Field | Type | ReadOnly | Description |
|---|---|---|---|
status | string | yes | "ready" (slot created, awaiting upload), "uploaded" |
fileId | string | yes | Unique ID for upload — generated when row is created |
url | string | yes | Public file URL — populated after upload |
fileName | string | no | Original file name — editable by user |
hash | string | yes | Content hash (SHA-256) |
extension | string | yes | File extension (e.g., "jpg", "pdf") |
mimeType | string | yes | MIME type (e.g., "image/jpeg") |
size | number | yes | File size in bytes |
width | number | yes | Image width in pixels (0 for non-images) |
height | number | yes | Image height in pixels (0 for non-images) |
fileName is the only editable field — you can rename files without re-uploading.
File Lifecycle
A file field goes through these states:
- 1. Ready
- 2. Uploaded
- 3. Replaced
When you create a row, the platform automatically generates a unique fileId for each file field in that row. The slot is ready for upload:
{
  "status": "ready",
  "fileId": "Ua4ZaUehur50VOp2odFvy",
  "url": "",
  "fileName": "",
  "hash": "",
  "extension": "",
  "mimeType": "",
  "size": 0,
  "width": 0,
  "height": 0
}
File uploaded — metadata populated automatically:
{
  "status": "uploaded",
  "fileId": "Ua4ZaUehur50VOp2odFvy",
  "url": "http://localhost:9222/files/Ua4ZaUehur50VOp2odFvy",
  "fileName": "cover.jpg",
  "hash": "a1b2c3d4e5...",
  "extension": "jpg",
  "mimeType": "image/jpeg",
  "size": 340000,
  "width": 1200,
  "height": 800
}
New file uploaded to the same slot — metadata updated, same fileId:
{
  "status": "uploaded",
  "fileId": "Ua4ZaUehur50VOp2odFvy",
  "url": "http://localhost:9222/files/Ua4ZaUehur50VOp2odFvy",
  "fileName": "cover-v2.png",
  "hash": "f6g7h8i9j0...",
  "extension": "png",
  "mimeType": "image/png",
  "size": 520000,
  "width": 1600,
  "height": 900
}
Upload Process
Admin UI
In the Row Editor, click the upload icon on a file field:
- Drag-and-drop or click to select a file
- Image preview for supported formats (jpg, png, gif, webp, svg)
- Replace an existing file by uploading a new one
- Edit
fileNameinline
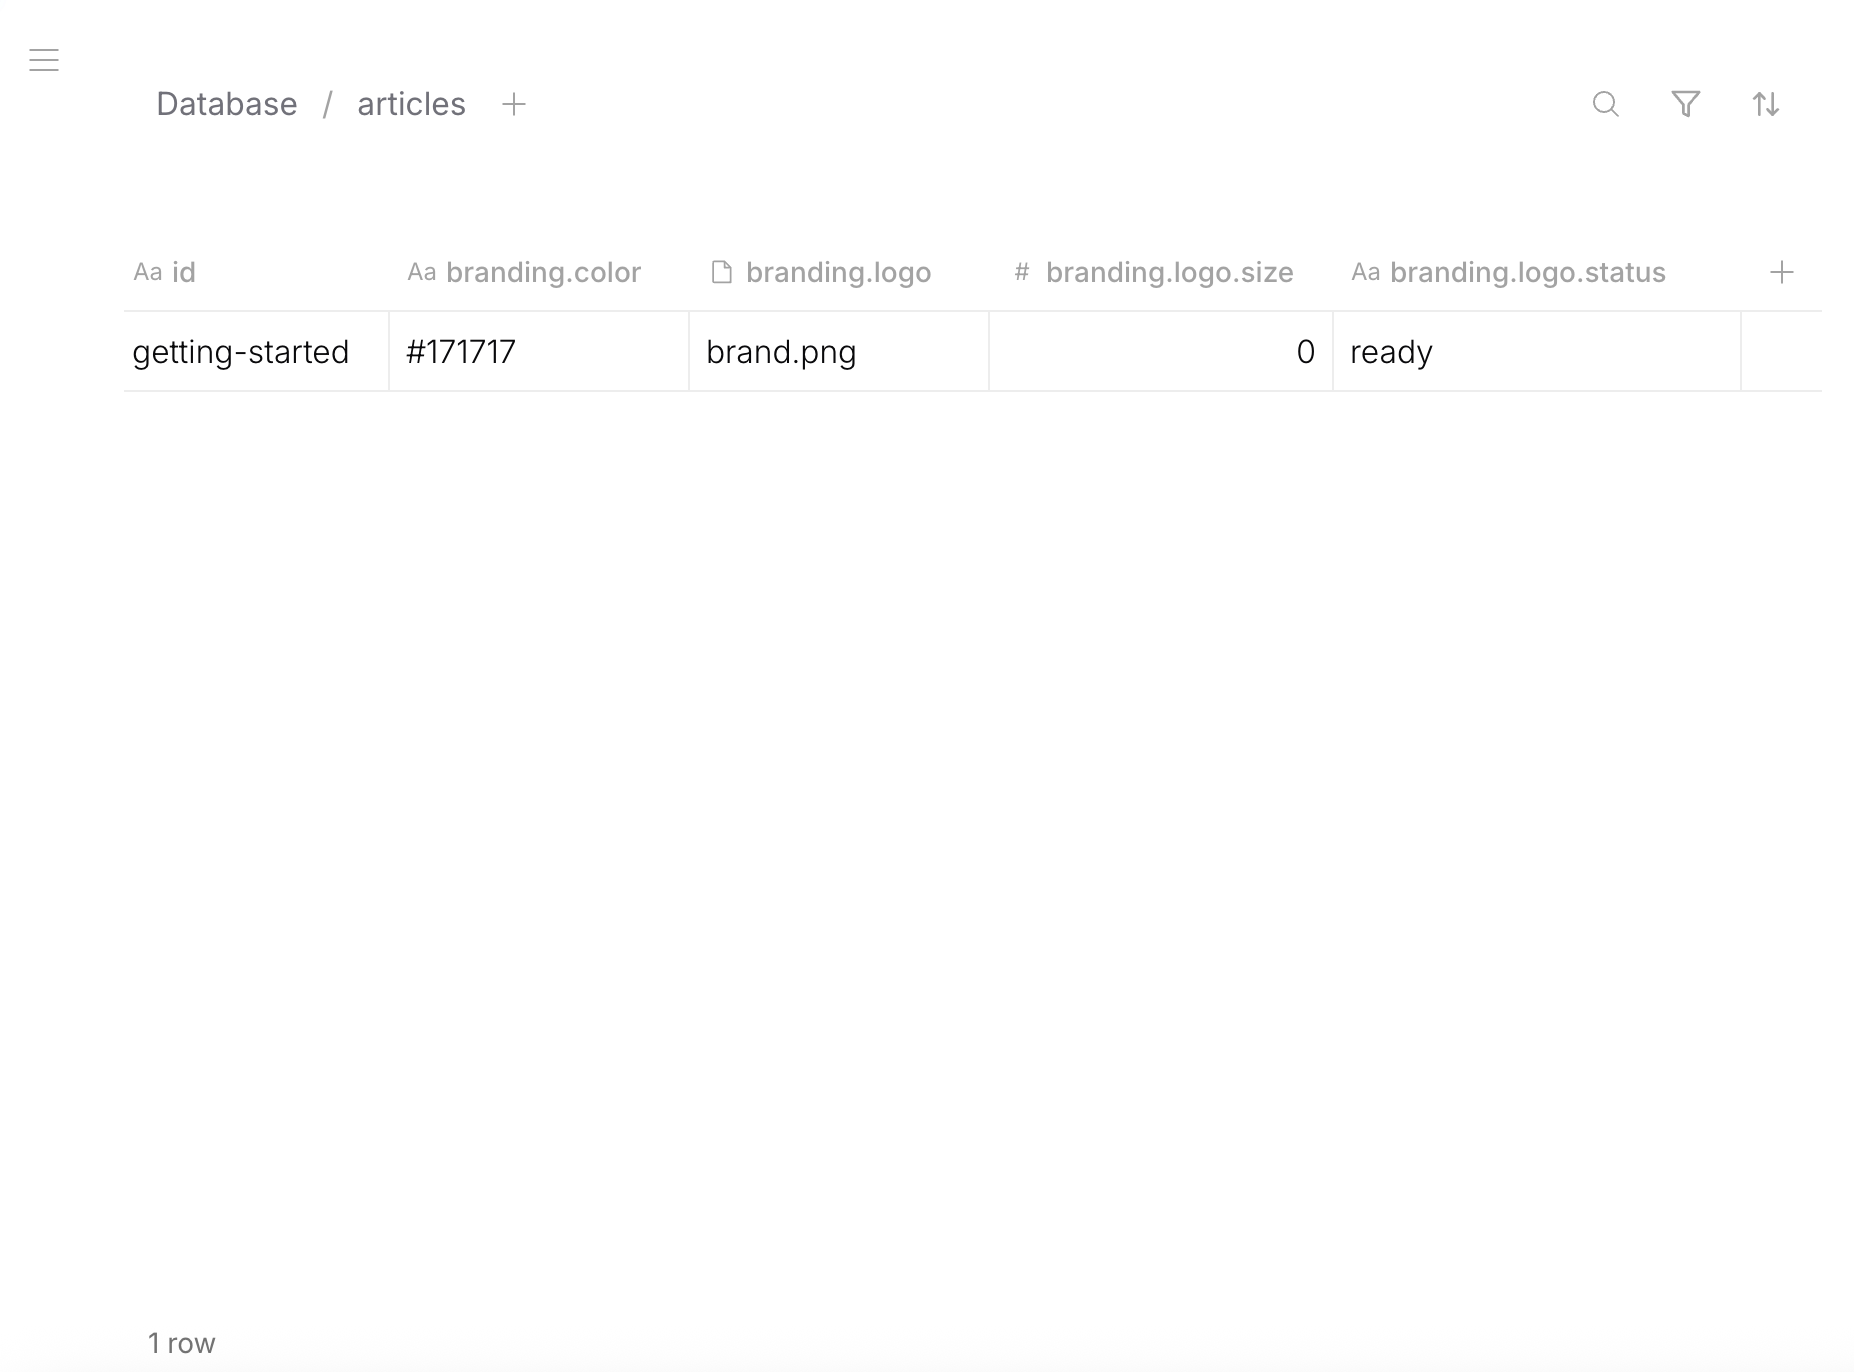
In the Table Editor, file field columns show fileName, size, status, and other metadata. You can also upload directly from the table view.
REST API
Two-step process:
Step 1: Create or update a row — the response includes fileId for each file field:
curl -X POST /api/revision/<draftRevisionId>/tables/products/create-row \
  -H "Content-Type: application/json" \
  -H "Authorization: Bearer <token>" \
  -d '{ "rowId": "iphone-16", "data": { "title": "iPhone 16 Pro" } }'
Response includes file fields with assigned fileId:
{
  "data": {
    "title": "iPhone 16 Pro",
    "cover": {
      "status": "ready",
      "fileId": "abc123-def456-...",
      "url": "",
      "fileName": "",
      ...
    }
  }
}
Step 2: Upload the file using the fileId:
curl -X POST /api/revision/<draftRevisionId>/tables/products/rows/iphone-16/upload/abc123-def456-... \
  -H "Authorization: Bearer <token>" \
  -F "file=@cover.jpg"
After upload, the file field is populated with URL, size, mimeType, dimensions, and hash.
File Placement
File fields can appear anywhere in your schema:
Entire row is a file — dedicated assets table, each row = one file:
{ "status": "uploaded", "fileId": "...", "url": "http://localhost:9222/files/...", "fileName": "logo.svg", ... }
Root array of files — each row is a gallery:
[
  { "status": "uploaded", "fileName": "front.jpg", ... },
  { "status": "uploaded", "fileName": "back.jpg", ... }
]
Root-level field — product cover, user avatar:
{ "title": "iPhone 16 Pro", "cover": { "status": "uploaded", "fileName": "cover.jpg", ... } }
Array of files — photo gallery, document attachments:
{ "title": "Product", "gallery": [{ "fileName": "photo1.jpg", ... }, { "fileName": "photo2.jpg", ... }] }
Inside nested object — company branding, category icon:
{ "branding": { "logo": { "fileName": "brand.png", ... }, "color": "#171717" } }
Inside array of objects — carousel with captions:
{ "slides": [{ "image": { "fileName": "step1.jpg", ... }, "caption": "Step 1" }] }
Assets
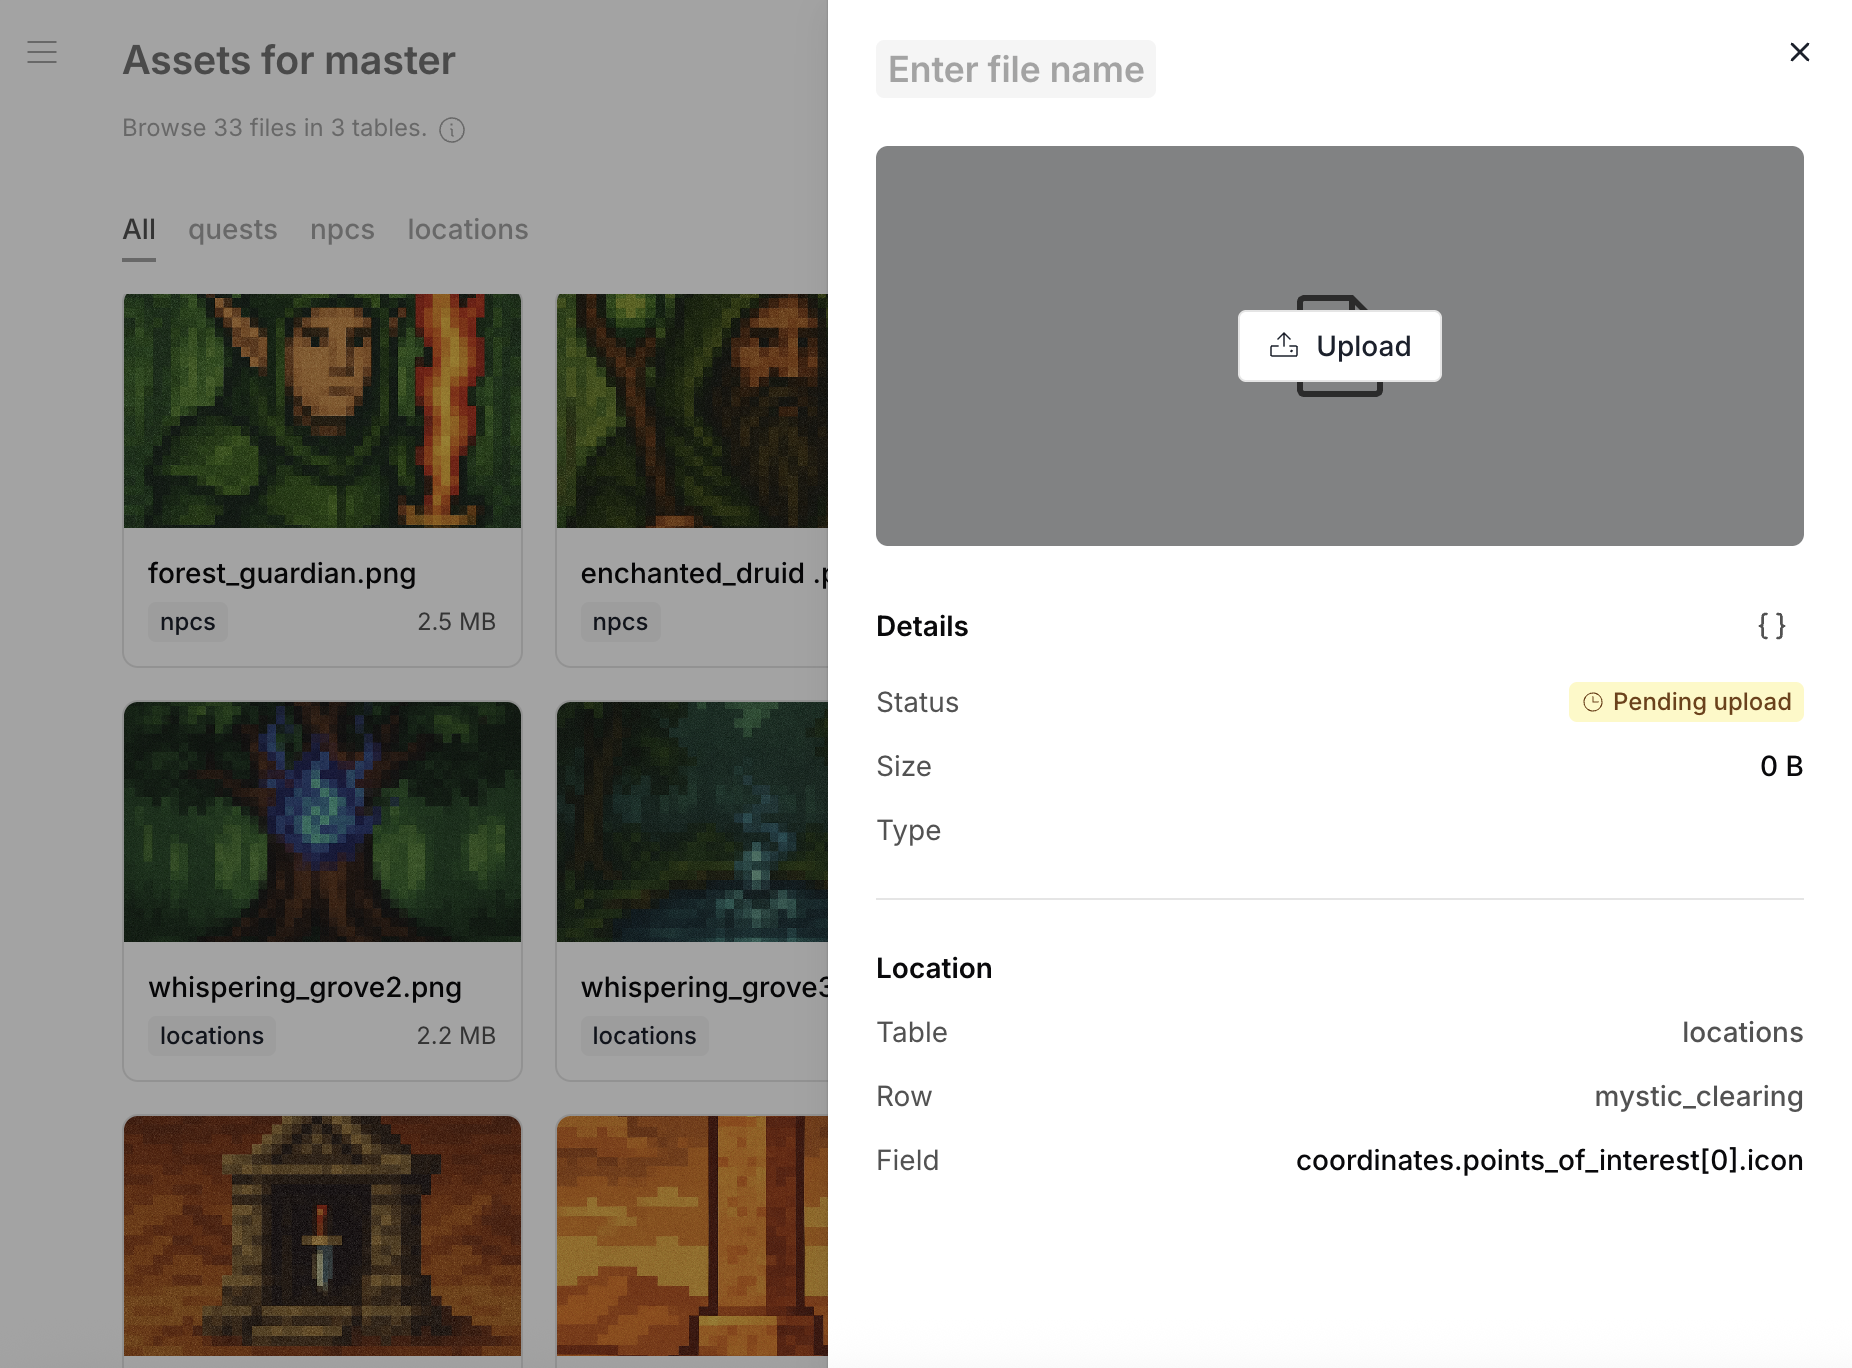
The Admin UI includes an Assets view — a gallery of all files across all tables in the project.
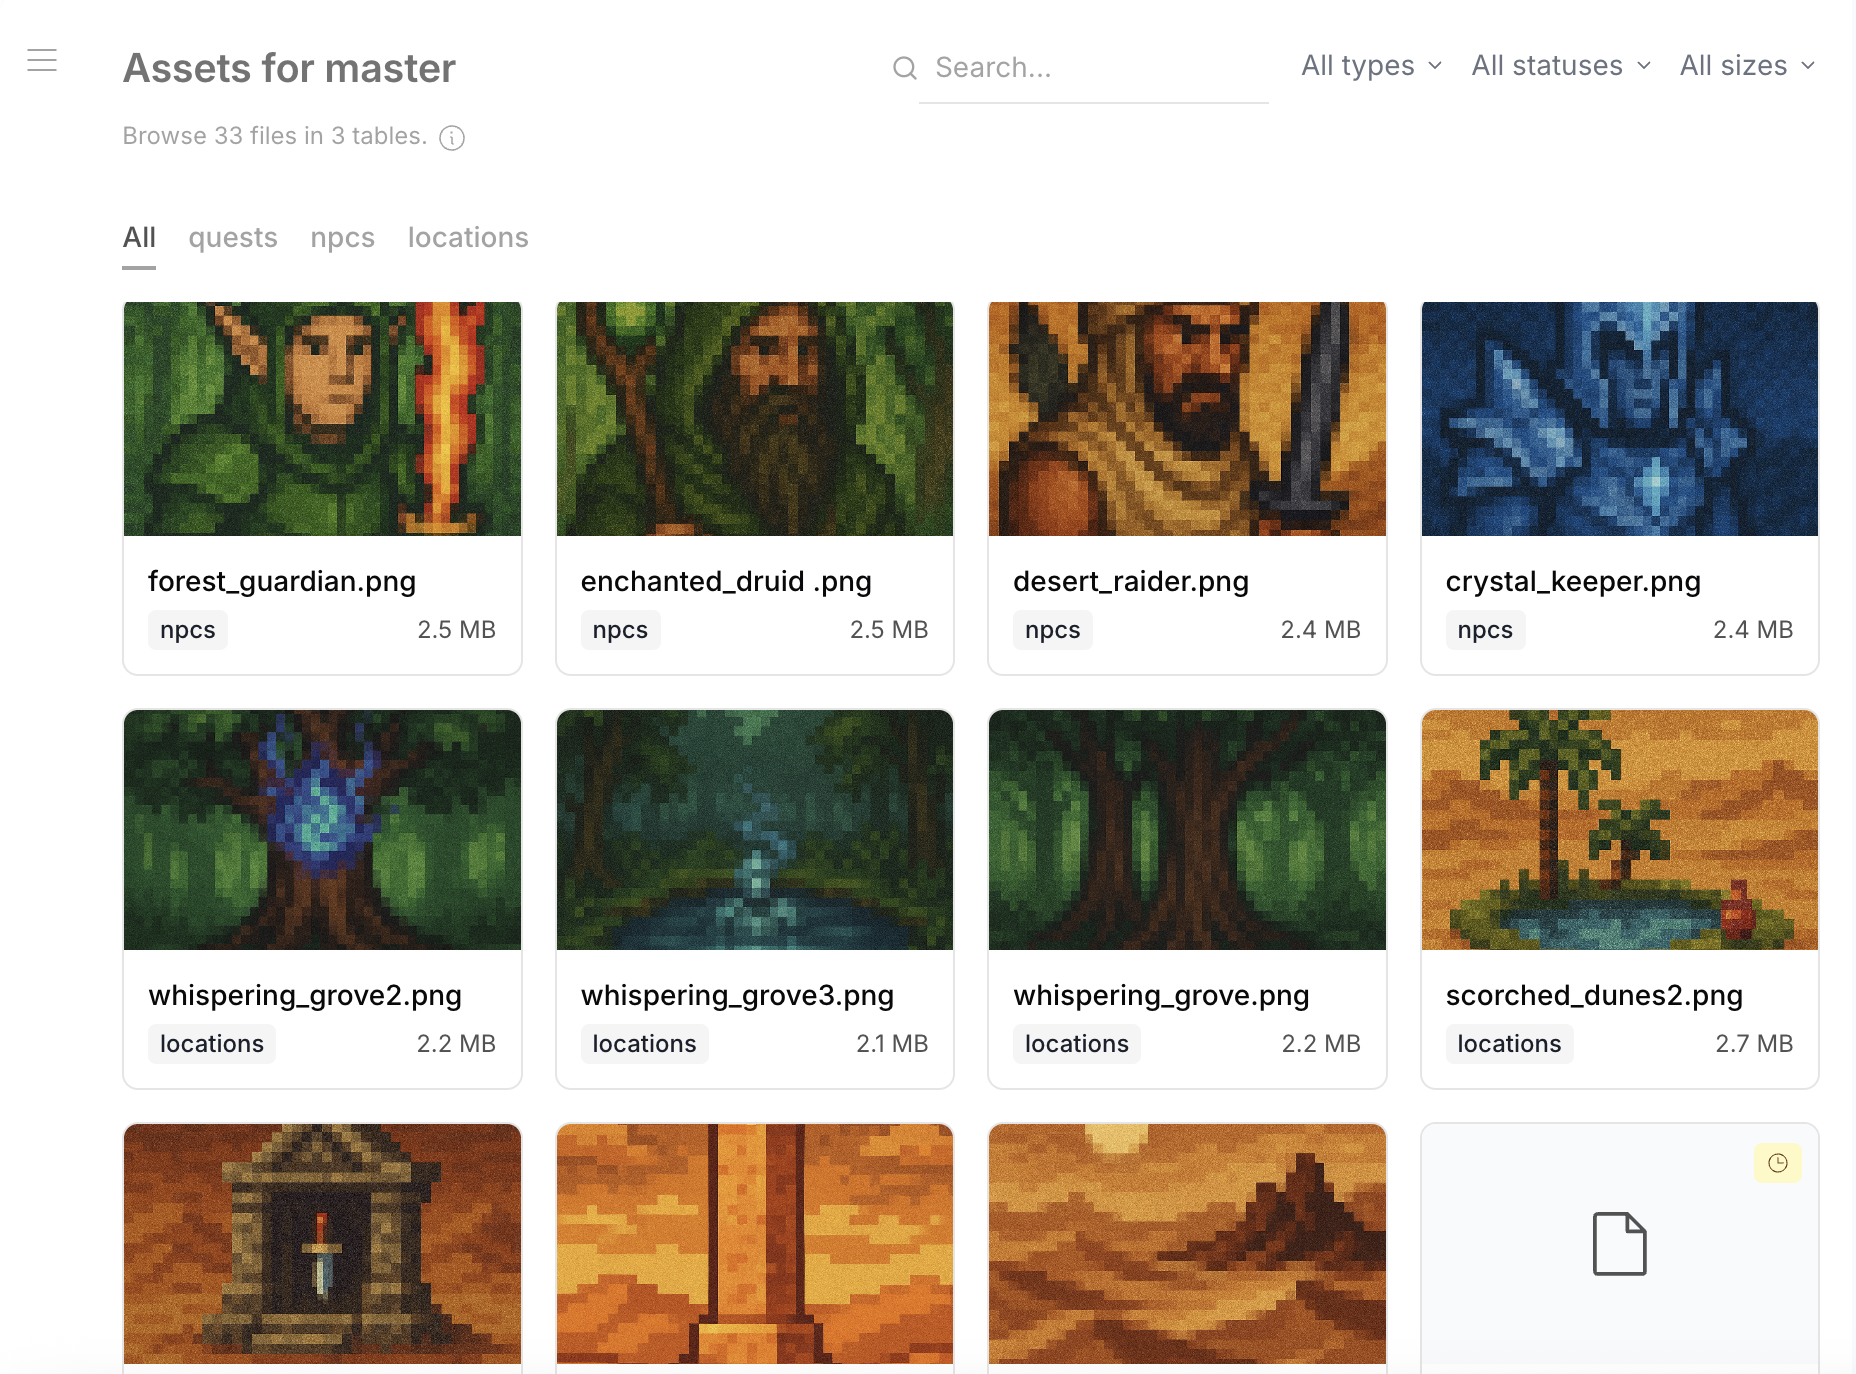
Features
- Gallery view — thumbnails for images, icons for documents
- Filter by table — show files from a specific table only
- Filter by type — images, documents, videos (based on mimeType)
- Filter by status — uploaded or pending
- Search — find files by name
- Pagination — even if one row has multiple files (e.g., a gallery with 50 images), each file appears as a separate entry
- File drawer — click any file to see full preview, metadata (URL, size, mimeType, dimensions), and which table/row it belongs to
Limits
- Maximum file size: 50 MB (not yet configurable)
- Standalone enables local file storage by default under
<data>/uploads - Self-hosted deployments must configure
STORAGE_PROVIDER=localor complete S3 settings for uploads (see Deployment) - Without a configured storage provider, file fields are available in schemas but upload functionality is disabled